

How To Personalize Cups With Cricut
Hi, crafters! This tutorial is LONG overdue and I finally have plenty free fourth dimension on my hands to get it done! Today, I'll be walking you lot through the steps to add your own wording to the bare Starbucks cold cup decal in Design Infinite. If you're a Silhouette user, I'1000 working on that post side by side then stay tuned!
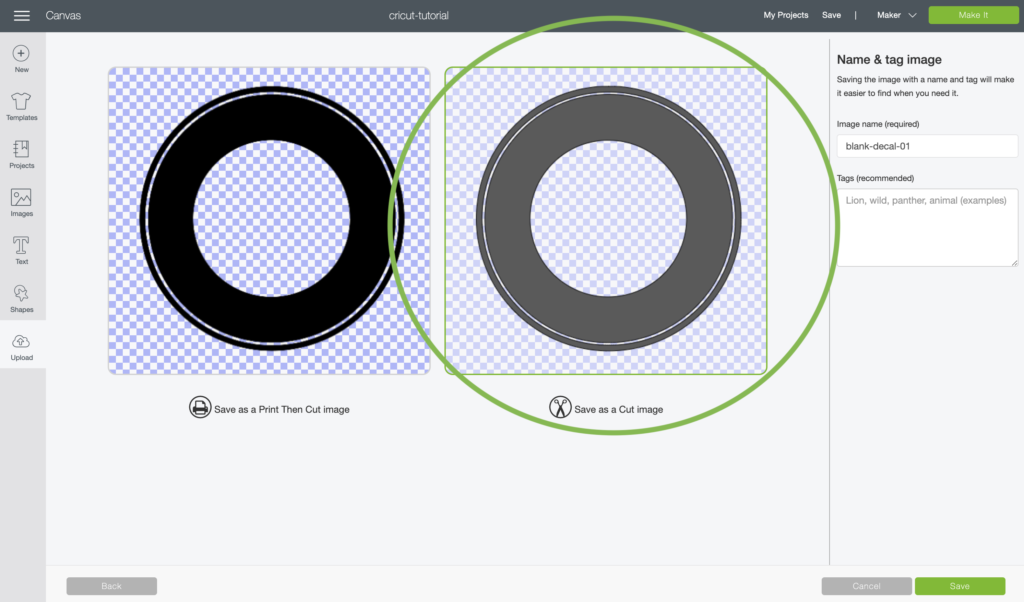
Stride One: Upload Decal
Download the blank circumvolve decal here and upload information technology into Blueprint Space. It's a transparent .PNG file so there should be no white infinite when you lot upload it, just make sure to save the file every bit a CUT Epitome and non a Print THEN CUT Image.
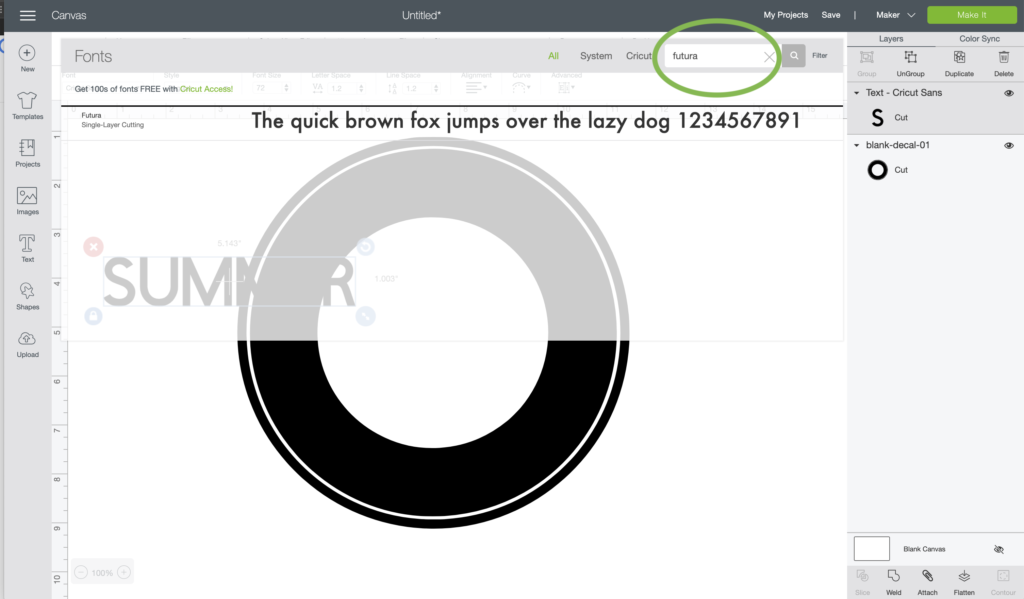
Step Two: Setup Text
Next, utilize the text tool to type the word(due south) yous want to place on the elevation one-half of the decal and change the font to "Futura".
*I use the font "Aharoni Bold" when creating decals in Adobe Illustrator but it isn't compatible with Blueprint Infinite. Futura is extremely similar.
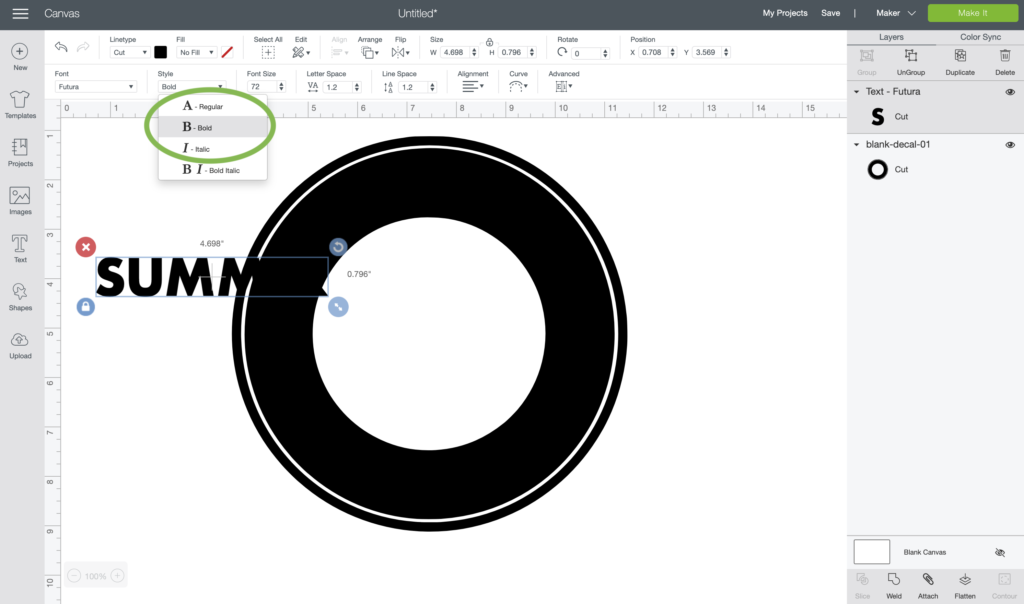
Now click the font way tool and select Bold.
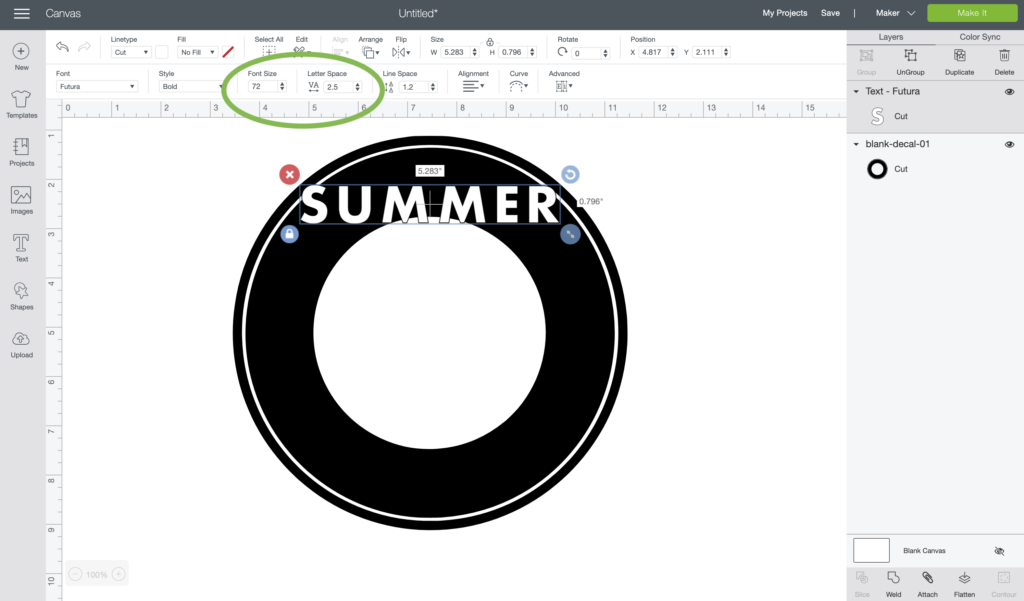
Adapt the font size and space the letters out to ii.5.
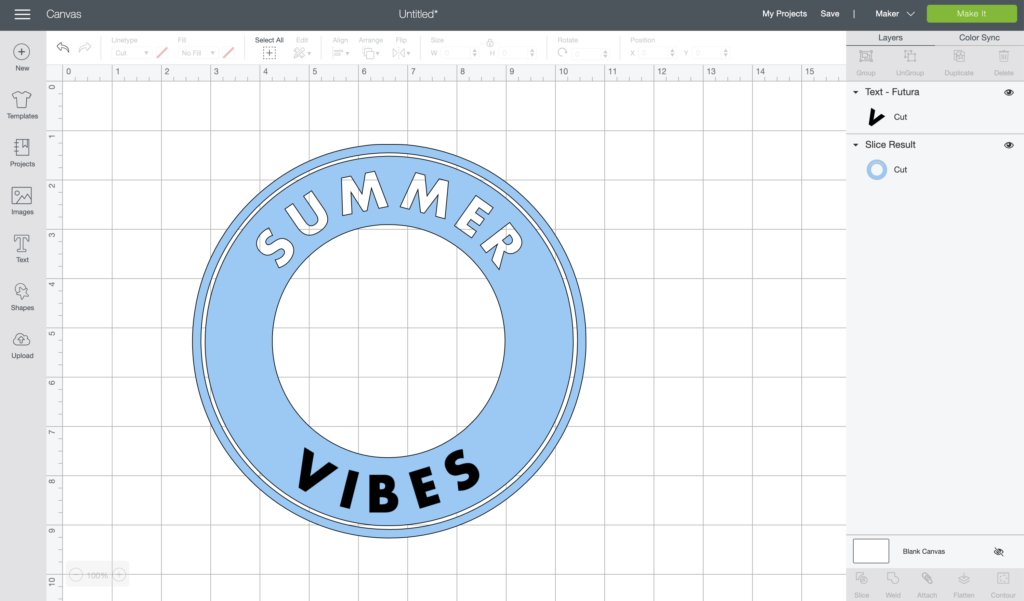
At present you tin can apply the curve tool to adjust the bend of the text. The curve volition be dissimilar for every word or group of words. But move the slider until you lot like the way it looks.
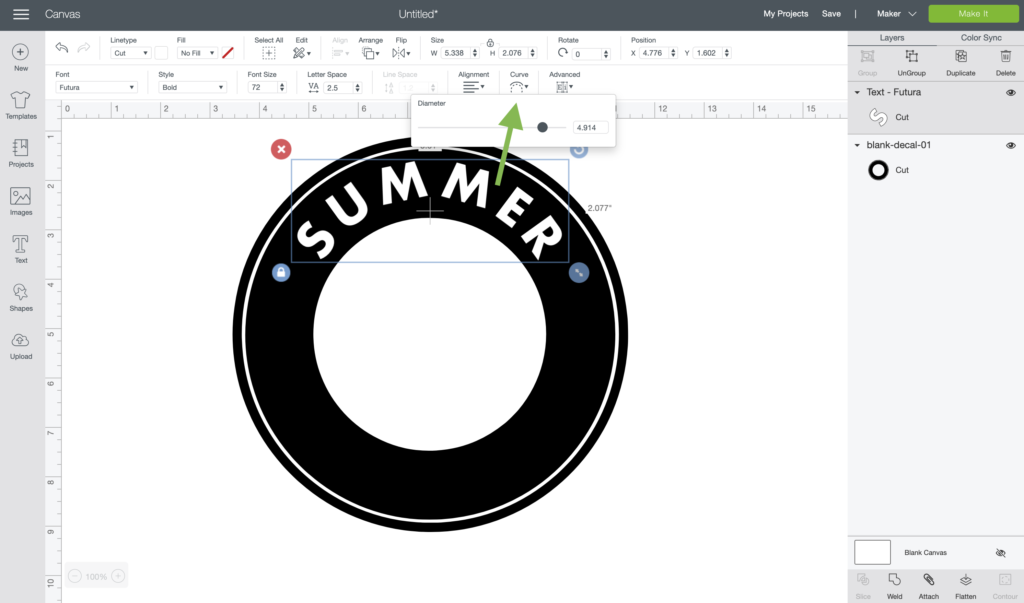
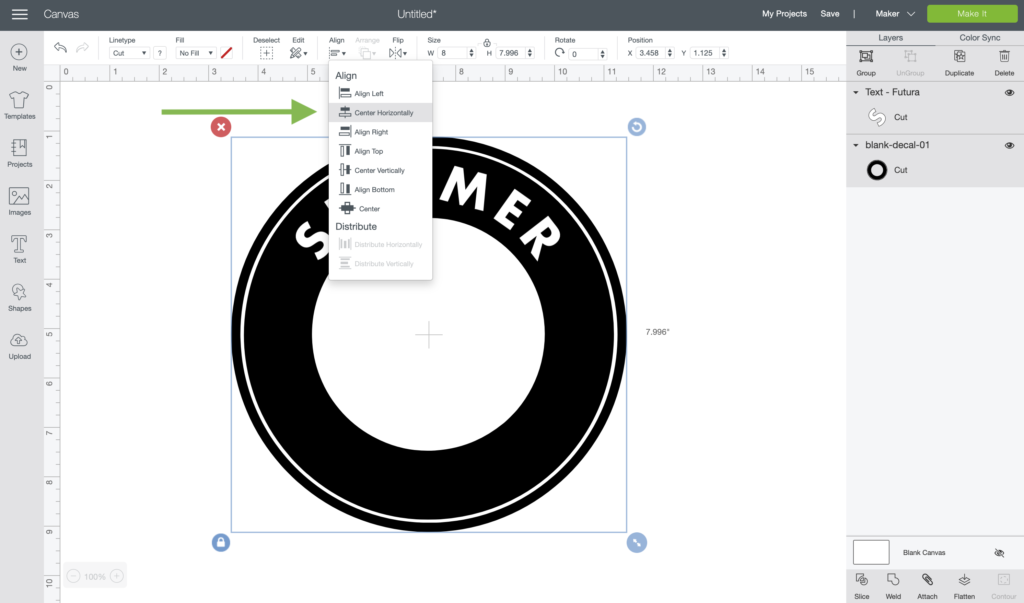
Once you have the text curved brand sure it is centered on the decal past using the align tool. You have to select both the decal and the word and and then click "eye horizontally".
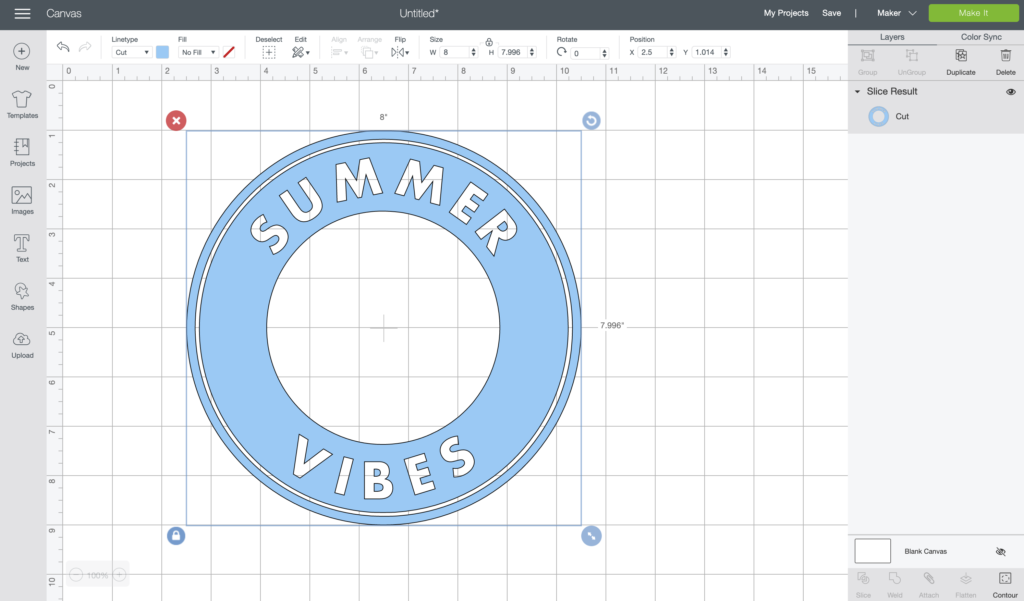
Step 3: Using The Piece Tool
At this point you need to select both the decal and the text once again and click the slice tool in the bottom right corner.
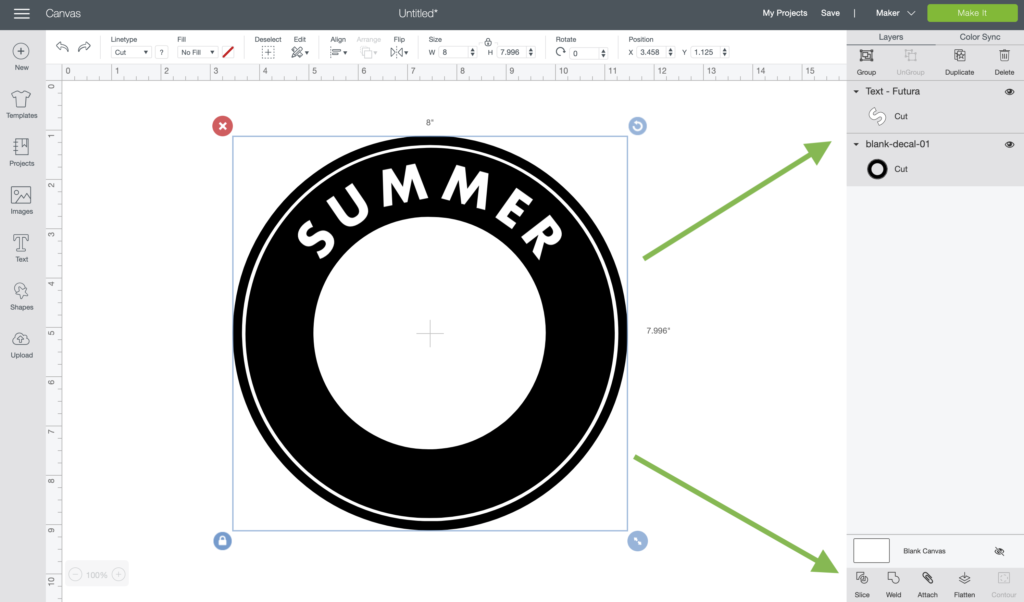
The slice tool is basically like a cookie cutter, whatever is on top will be cutting from the bottom layer. So in this case, the give-and-take summer was cut out of the circumvolve.
You lot tin now delete the two layers of text and you should just take the circle with the word cut out.
Pace Iv: Repeat Process
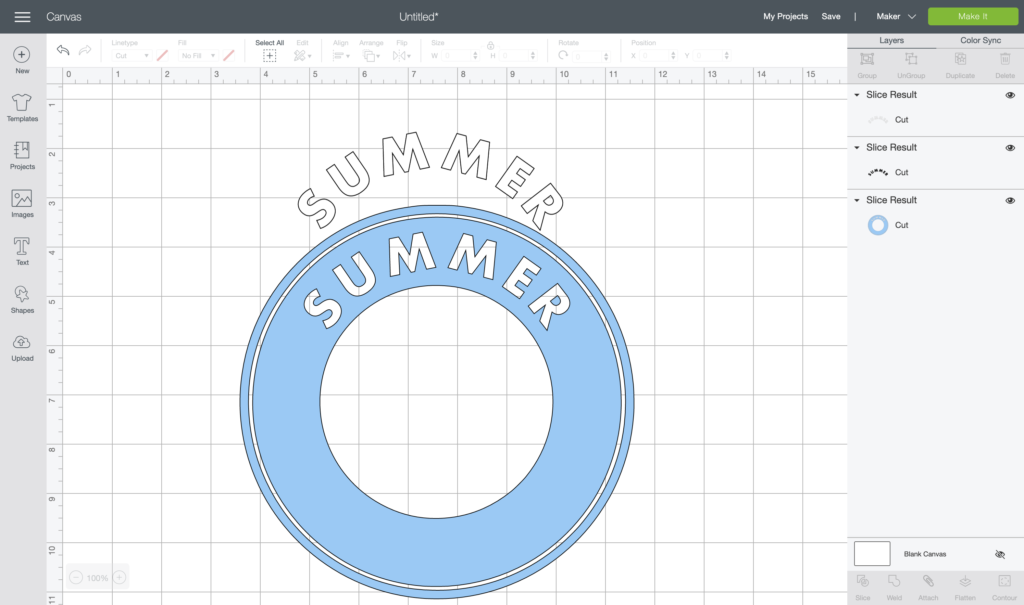
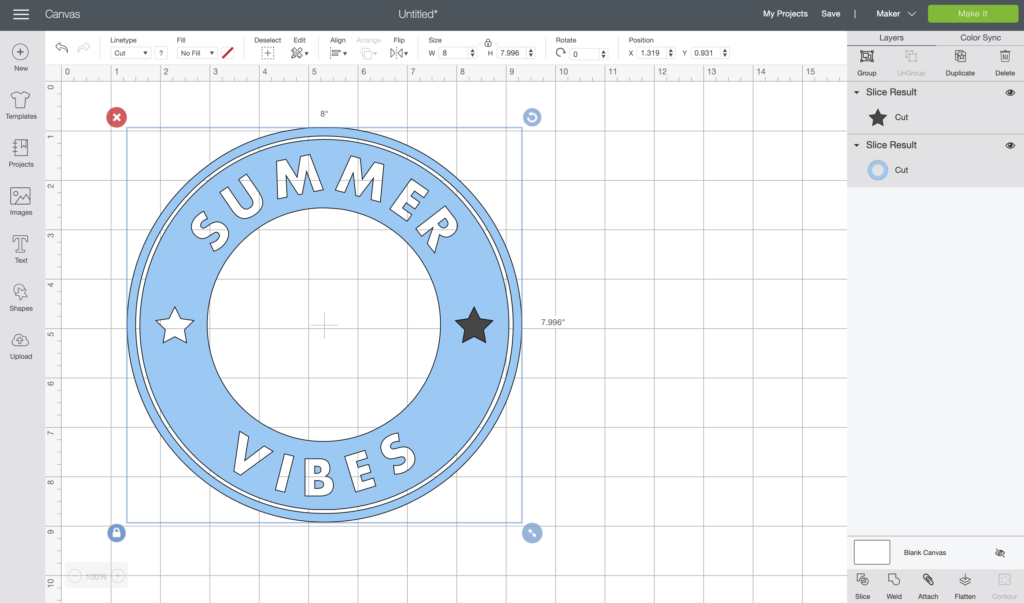
Now, echo the process for the bottom half of the decal.
When you're finished you should have a decal with both sets of words cut out.
At present you lot can add together whatever shape you'd like to the sides. I used the shapes tool to add stars and and so sliced them just like I did the text.
Remember, you can only slice 2 layers at a fourth dimension so if you try to add all of the words at in one case and then slice, it won't piece of work.
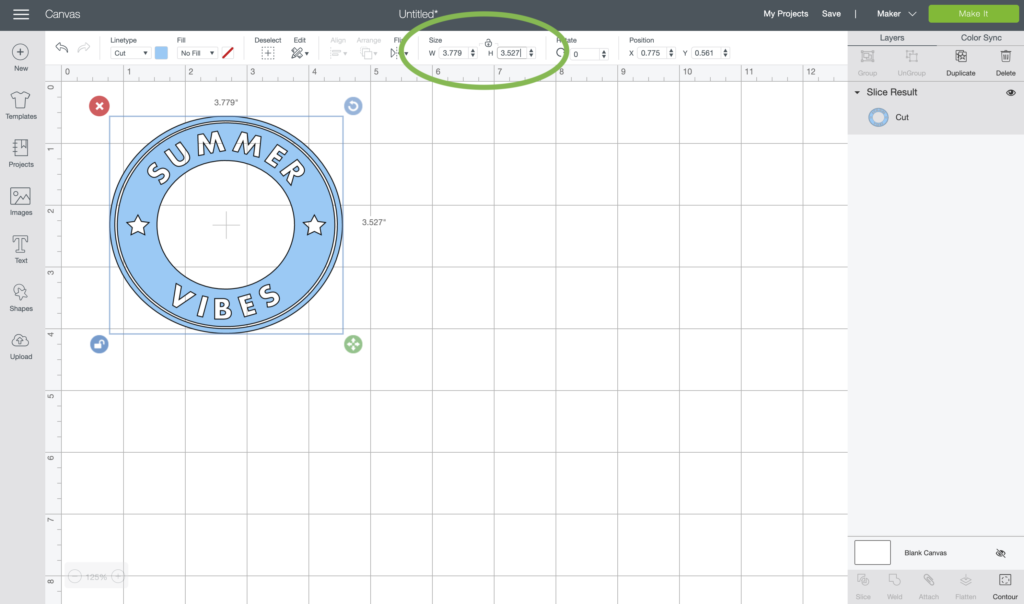
Pace Five: Adjust Size
The last step is to resize the decal to fit the cup. The dimensions beneath accept worked for me for the last year just lately people have messaged me saying the logo on the loving cup has gotten larger. Starbucks is constantly updating products so I don't doubt that they increased the size of the logo. For the best fit, measure the height and width of the logo on your loving cup and go by that.
For all-time results exist sure to use a quality agglutinative vinyl like Oracal 651. Expressions Vinyl has the all-time pick of Oracal 651 and yous tin use code kaylamade to save 10% off of your order.
If y'all take any questions just leave a comment or send me an e-mail!


How To Personalize Cups With Cricut,
Source: https://kaylamakes.com/2020/05/27/how-to-personalize-starbucks-decals-in-design-space/
Posted by: mondragonficut1962.blogspot.com
0 Response to "How To Personalize Cups With Cricut"
Post a Comment